Showing posts with label chocolate. Show all posts

Saturday, March 15, 2014

Grain-Free Chocolate-Coconut Kiss Cookies

As part of my Influenster #jadorevoxbox, I was given a family size bag of Hershey's Kisses to try and enjoy.  Let me repeat that: a FAMILY sized bag.  That's a lot of kisses for one girl - especially one girl who's trying to be conscious of her eating habits.  I prefer eating primal/paleo most of the time, but I don't mind the occasional splurge, so I came up with this recipe for chocolate cookies that use mostly primal friendly ingredients.  Of course, the Kisses aren't, but if you don't mind the splurge, go for it!

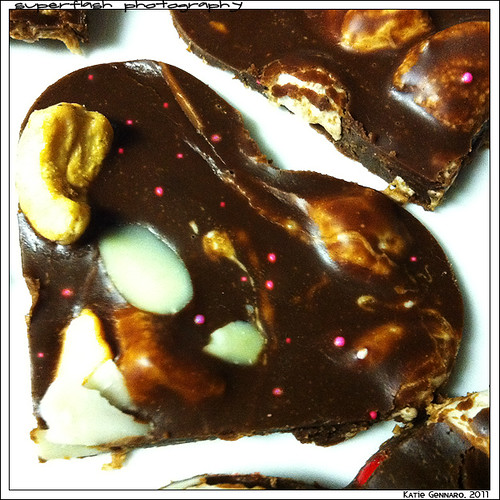
These cookies are rich, and sweet, and irresistible!


Ingredients:

  • 2 oz chocolate (I used Kisses, you can experiment with other milk/dark/bittersweet chocolate)
  • 1 1/2 cups almond flour
  • 1/2 cup cocoa
  • 1/2 tsp baking soda
  • 1/2 tsp salt
  • 3/4 cup coconut sugar
  • 1/2 cup butter, cubed
  • 2 eggs
  • 1 tsp vanilla
  • 1/2 cup unsweetened coconut flakes
  • 18 Hershey Kisses (or more/less depending on how many cookies you get out of your batch)


Method:

  1. Preheat your oven to 350.
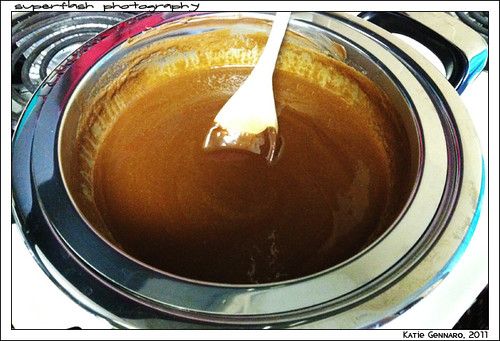
  2. Melt 2 oz of chocolate either in the microwave or over a double-boiler.
  3. To the base of a food processor add almond flour, cocoa, baking soda, salt and coconut sugar.  Pulse together until well blended.
  4. Add cubed butter.  Mix until dough is crumbly.
  5. Add eggs, vanilla, and melted chocolate.  Mix until smooth and fully incorporated.
  6. Pulse in coconut flakes.
  7. Drop by tablespoon-full onto a parchment- or silpat-lined baking sheet (note: I ran out of parchment so I used foil that was greased with coconut oil).  They will spread quite a bit while baking, so make sure you leave enough space around each cookie.  I fit 9 on an oversized cookie sheet.  Press a Hershey Kiss into the top of each cookie.  
  8. Bake for 8-10 minutes or until set.  Remove from oven and place on a wire rack to cool.  They'll still be soft, but will firm up out of the oven.
These were pretty darn delicious.  Everyone who tried one gave me lots of compliments, and didn't even realize that they were made with my "crazy" ingredients! Love when that happens.


** Note: I do have process photos of all the steps, so if you need them, feel free to leave a note in the comments.  I'm not sure that they add much to the recipe, because it's all pretty straight forward.  But let me know if you need help with any of the steps!
Pin It

Wednesday, October 9, 2013

Halloween Oreo Peanut Butter Brownies

Yes, you read that title right. :)

This is a chocolate lover's dream and the recipe is super simple! I made these to thank one of my Howl-O-Scream co-workers for being incredibly helpful to me during our dress rehearsals.  I hope you'll pardon my somewhat unscientific way of making these.

Ingredients:
- Halloween Oreos (or regular Oreos, your choice)
- Peanut Butter
- Brownie Mix (I used a 13 x 9 mix, that yields about 8-9 good, big brownies - an 8 x 8 mix would likely get you a good half dozen)
- Eggs  *for brownie mix
- Vegetable Oil  *for brownie mix
- Muffin Tin
- Non-Stick Spray

Directions:

- Open Oreos and the peanut butter - and be sure to check the Oreos for quality! ;)

- Spread a thin layer of peanut butter on one side of two Oreos; stack this and place to the side
- Repeat this until you have at least 6 stacks - you can make more stack later if you have enough mix

- Preheat oven to temperate recommended by brownie mix - this was 350 for me

- Prepare brownie mix according to mix instructions

- Spray muffin tin generously with non-stick spray

- Place Oreo stacks in the center of each muffin cavity
- Carefully pour mix over the stacks, covering completely (I use a large spoon to do this)
- If you have leftover mix, make more stacks!

- Bake for at least 25 minutes - the mix instructions don't really have recommendations for making brownies in a muffin pan

- Using a toothpick, check for doneness of the brownies on the sides (otherwise, you'll just hit the Oreo cookie!) - if the toothpick isn't clean, leave the brownies in there for a few more minutes (but don't forget!)
- Slide the brownies out of the muffin tin and let cool

- Enjoy!

Other Questions:

Can I use Peanut Butter Oreos/Winter Oreos/Double Stuf Oreos?

Yes! You can use whichever Oreo cookie you like best, if you think they'll go well with the peanut butter and brownie mix! Just make sure to cover the cookies with batter if you go with the Double Stuf ones!

What peanut butter should I use?

Creamy peanut butter is the easiest to spread, but if you like crunch peanut butter, go for it!  Totally personal preference!

Can I make these in a cupcake pan?

My first attempt at these was in a cupcake pan, and I found that two cookies stacked came to the top of the pan and didn't really allow me to cover them in brownie mix. But you are welcome to try it! I just personally think a muffin pan that is deeper works better. 


These have been an absolute hit with my friends, so I hope you'll enjoy them as much as we do! Happy baking!

Pin It

Sunday, November 6, 2011

Chocolate Fruit Bark

This is now my favorite recipe!! I used 2 dark chocolate bars, a mixture of tropical dried fruit, handful of raisins, slivered almonds, handful of cranberries and cinnamon. Below is the recipe, but I think this is the kind of recipe where you can alter it in any way. Add or remove any ingredients to suit your sweet tooth. Enjoy!

Ingredients:

12 oz high-quality dark chocolate (at least 70% cocoa)
1/2 cup golden raisins
1/2 cup dried tart cherries
1/2 cup dried mango, chopped
1/2 cup cashews, chopped
1/2 tsp cinnamon
1/8 tsp cayenne or chili powder (optional)
1/4 tsp ginger powder (optional)

Line a rimmed baking sheet with wax paper of lightly greased parchment paper.

Using a double boiler, melt chocolate until very smooth. Stir in half the dried fruit, cashews and spices.

Spread the chocolate mixture onto the baking sheet. Sprinkle with remaining dried fruit.

Chill in refrigerator until firm, about 30 minutes.

Break into pieces of desired size.
Pin It

Monday, May 23, 2011

Romance Yourself: Chocolate Strawberry Cake


Happy May Day
So it is May 24 and while some people hit the bars and the “24’s”-eh I was plotting my evil cake plots. Well truth be told there is an entire meal planned out before this cake. But we are going to stick with the cake on this one.

Things you need:

CAKE
12 eggs separated (I find this works best with your hands)
1 cup white sugar
1/3rd cup cocoa powder

MIDDLES
Homemade strawberry Jam
Strawberry
Chocolate Mousse

EXTRAS
Butter and line 2 9-inch cake pans. Set your oven for 350 F - you will be baking for about 30 mins or until the cake springs back to the touch.
In bowl 1 (aka the bigger bowl):
Beat egg yolks and the one cup sugar together for about 3 minutes until it is a nice pale spring time yellow.
Sift in the cocoa powder and then using a soft spatula fold and blend in.

In bowl 2, beat the whites of the eggs until they form soft peaks – how you know you are done is when you lift your hand mixer out and a little “peak” is left- also the bubbles are no longer bubbles and look solid.
In about 3 sections, fold the egg whites into the first bowl.
Pour into equal parts into 2 9-inch buttered pans and bake.
When done baking, pull out the cakes and let them rest until they are 100% cool.

On the first layer add strawberry jam followed by a layer of diced strawberries and then a sprinkle of sugar powder and top with chocolate mousse.
Drop 2nd layer of cake on. Add another layer of strawberry jam, then a layer of chocolate mousse and decorate with strawberries on top.
When I served this I added melted dark chocolate that I swirled over the cake and plate with a big blob of whip cream .

ENJOY!


Pin It

Sunday, February 13, 2011

Quick & Easy Valentine's Treat

Still searching for a quick Valentine's treat?  Look no further!  I first saw this idea for chocolate dipped Oreos on D.I.Y. Louisville's blog - a semi-handmade treat that looks pretty and will be very well appreciated, especially if you present it nicely.  Check out her site for the full tutorial... but basically what you'll need is some lollypop sticks, Oreos (I used Cool Mint, to give it a little bit of a different flavour), chocolate or candy melts, melted, and some sprinkles.

Then all you do is stick the lollypop stick in the middle of the cookie, coat it with the melted chocolate, and rest it on some wax paper to dry.  Add your sprinkles before the chocolate dries.

For my presentation, I used some cellophane bags with pink heart ribbon tied around them.  I cut out heart shapes using my Cricut... and on the back, I used one of my new Stampin' Up stamps (from the Amour Par Définition collection) and signed it.

The most time consuming part was waiting for the chocolate to set!

Happy Valentine's Day!

Pin It

Rocky Road Heart Bars

First, let me warn you - these bars are NOT for the faint of heart, or those that are on a diet.  But they ARE freaking delicious.  And adorable.  Wouldn't you love to be my coworker, devouring one of these tomorrow? Here's what you do.

Ingredients:
  • 1/2 cup butter
  • 1 (heaping) tbsp Nutella
  • 2 (heaping) tbsp Peanut Butter
  • 2 squares Bakers Chocolate (bittersweet)
  • 1/2 cup of "mix ins"
Method:
1. First, prep your workspace by lining a baking sheet with parchment paper or wax paper (you can spray it with cooking spray if you prefer).
Using a double boiler (or a pot with simmering water, and a stainless steel bowl sitting on top), begin melting your butter, Nutella, peanut butter and bakers chocolate until it's smooth (see picture at right for consistency).


2. Remove the chocolate mixture from the heat, and add in your "mix-ins" - I used marshmallows, nuts and red m&m's.  Spread your mixture over the baking sheet, and spread some extra nuts/chocolates/sprinkles/whatever over the top of the chocolate.  Allow it to cool.  (I placed it in the fridge for about an hour, or maybe 2?)


3. Once cooled, use heart-shaped cookie cutters to press out heart shaped bars out of your chocolate mix.
One thing of note - this mix could probably use some sort of chocolate stabilizer, but I don't have any.  I would recommend either adding some in, if you have it, or keeping these in the fridge until right before you serve them.  They are pretty "melty" ... but delicious!


This recipe made 12 hearts, plus a little extra (I took my scraps and put them in an oven/microwave safe Pyrex dish, melted them down in the microwave to smooth them out a bit, and put them back in the fridge).  This doesn't have to be a Valentine's thing - at any other time of year, you can use any sort of cookie cutter, or even just cut them into squares.


Pin It

Romance Yourself Breakfast


Good morning!
There is nothing like breakfast. I could eat it for ev
ery meal of the day. Ok, so you can’t surprise yourself with breakfast in bed you sure can still enjoy a little early day treat. Yes please note I didn’t
say AM because really why restrict yourself to the before noon hours any way.
French Toast
1 Banana
2 slices of ancient grain bread (or super fluffy crusty white bread if you are naughty)

2 table spoons of powdered sugar
1 table spoon of organic PC sugar
3 eggs
2 table spoons of cream
½ teaspoon of vanilla extract
1 teaspoon of coconut oil
So in a shallow bowl mix egg and cream and organic sugar
Soak break in the mix and put into a frying pan on med heat with coconut oil melted. Slow cook this on each side until all colors of yellow and brown and fluffy white.
Slice bananas and top the fried bread with it, add the white chocolate chips and dust with powdered sugar.

For an alternative sugar breakfast switch the vanilla with almond extract and the white chocolate chip with butterscotch. Switch the Bananas to strawberries or red berry fruit salad. I will add a picture of this version the next time I make it.


Pin It