Showing posts with label primal. Show all posts

Monday, September 8, 2014

Paleo Peach Crisp for One (or two!)


Living on my own, I don't always get to my produce when it's in the best shape for eating raw, so when I was faced with a giant peach that smelled delicious, but was slightly soft, I thought I could either cut it up and mix it into my yogurt, or I could make myself a delicious Sunday morning treat.  With no grains/gluten and no refined sugar in the house, this was pretty much a no-brainer.  I dug through my pantry and fridge, and came up with a recipe that I think will become a staple in my kitchen (I plan on replacing the peach with apples in the fall - yum!)


Paleo Peach Cobbler for One

Ingredients:

Peach mixture:
  • 1 ripe peach, peeled and cut into small chunks
  • 1/2 a vanilla bean 
  • 1/4 tsp cinnamon
Crisp mixture:
  • 3 tbsp ground flax seeds
  • 1/4 cup almond flour
  • 2 tbsp shredded, unsweetened coconut
  • 3 tbsp butter, melted
  • 1 tbsp maple syrup
  • 1/4 tsp vanilla
  • 1/4 tsp cinnamon
  • dash of sea salt
  • slivered almonds (optional)
Method:

Preheat oven to 350 degrees.


Place peaches in a bowl.  Scrape vanilla beans on top of peaches, add cinnamon and combine.
Place the fruit mixture at the bottom of a small oven-proof dish (I used a 23cm dish) or individual ramekins & set aside.


In a separate bowl, combine flax, almond flour and coconut until blended.  Add the wet ingredients & spices, and mix until combined.  

Top the peaches with the crisp mixture.  Add slivered almonds if desired.  

Bake for about 20-25 minutes, or until the topping is a light golden brown.  


This makes an awesome breakfast when served warm... or throw some homemade vanilla ice cream or frozen yogurt on the side for a quick and easy dessert.  


Pin It

Saturday, May 3, 2014

Paleo General Tso-Inspired Chicken

When I found some ground chicken on sale for a great price at the grocery store, I just had to pick up a package... but then I found myself wondering what to make with it.  I could have made fajitas or meatballs, but I wanted something different - and I was really in the mood for broccoli.  Fajitas and broccoli just don't go together in my mind, so I had to come up with something new!
I used ingredients that are staples in my fridge & pantry - and because I was super hungry, I had to come up with something quick.  The little bit of tapioca included in the sauce thickens it up nicely, and it tastes so good.  This recipe serves two, but I must admit - I definitely went back for seconds after finishing my first dish!


Ingredients:

Sauce:
Chicken:
  • 1 tbsp olive oil
  • 250 grams ground chicken (1/2 package)
Side:
  • 1 cup frozen broccoli
Method:

  • Add all ingredients for the sauce to a bowl and whisk together until smooth. Set aside.

  • Heat olive oil on medium high heat in a pan. Add the chicken once the oil is hot. Once the chicken is browned, add the sauce to the chicken. Cook a few minutes longer until the sauce thickens.

  • Meanwhile, steam your broccoli using a steamer and a shallow pot of water.  If desired, you can add a little bit of minced garlic to the broccoli for a little bit of extra flavour.

  • To serve, place the broccoli in the bottom of a dish, and spoon the chicken on top, allowing the sauce to drizzle over the broccoli.  

Note: this would also taste great with some jasmine or basmati rice, if you allow rice into your diet!

Servings: 2


The recipe doesn't take long at all to prepare - maybe 30 minutes max from ingredient gathering to final meal, so it makes it perfect for a work night.  I think it would taste great as leftovers too, however, I would probably steam the broccoli fresh the next day - microwaved/reheated broccoli doesn't always have the same flavour.


I'm pretty sure that this recipe will be added to my current rotation of weeknight dinners - how about you? Are you going to give it a shot?  Leave tips in the comments if you try it or customize it for yourself!


Pin It

Monday, February 18, 2013

Primal Eggplant Parmigiana Stacker

I bought an extra large eggplant with the intent of making eggplant fries.  So I chopped the eggplant in half and began fastidiously breading and frying.  The eggplant fries were delicious, but very time consuming.

So then I was left with half an eggplant, and I wasn't sure what to do to it.  Being Italian, eggplant parmigiana was a staple in our household, and I always loved it, but I had never made it before.  I searched out a couple of recipes online for a basic idea, and added some things that I had learned from my mom & grandmother, and voila!

This is the most delicious way I have ever had eggplant prepared before!

Ingredients:

For the sauce:

  • 1 bottle of Strained Crushed Tomatoes (I use a 660 mL bottle by Aurora, the only ingredients are tomatoes & salt)
  • A few leaves of fresh basil
  • salt, pepper, garlic powder, oregano 
For the eggplant:
  • 1/4 cup almond flour
  • 1/4 cup parmesan cheese
  • 1-2 tbsp fresh chopped basil
  • salt, pepper garlic powder
  • 1 egg
  • Olive Oil for frying
Method:
1. First start your sauce by dumping the entire bottle of crushed tomatoes into a sauce pan.  Add a few leaves of fresh basil and your spices (the spices are always done to taste, rarely measured, in an Italian household - just taste the sauce as it's cooking and see if you need to add more).  Start the sauce at a medium heat, and then lower it as it simmers.  You can give it a stir once in a while, but mostly, it should be okay just sitting there.


2. In a shallow dish, combine your almond flour, parmesan cheese, basil and spices (again, spices are to taste... just give them a couple of shakes and you should be okay).  In a separate dish, crack your egg and whisk it.

3. Slice your eggplant into rounds about 1/4 inch thick (mine was already sliced in half from the previous recipe, but rounds would be even better).  Dip the eggplant into the egg, and then into the almond/parmesan to coat both sides.  (If you need to make more breading, just keep the ratio of parmesan and almond meal at 1:1)

4. Place your eggplant into a hot skillet with a small amount of olive oil for frying.  Cook on each side until the almond coating is browned and the eggplant is tender.  Then place on a plate with a paper towel on the bottom.

5. When you are ready to plate the dish, serve in stacks with sauce in between each layer of eggplant (I found that stacking them 3-high was perfect).  On the top layer, you can add some shredded mozzarella, more parmesan cheese, or a basil leaf for presentation.  


This was honestly the best parmigiana I have ever had!  I made enough intending for my husband to take it to work for dinner, but we both went back for not only seconds, but THIRDS! We ate the entire batch in one shot.


If you decide to try it out, leave a comment and let me know what you think!


Pin It

Monday, February 11, 2013

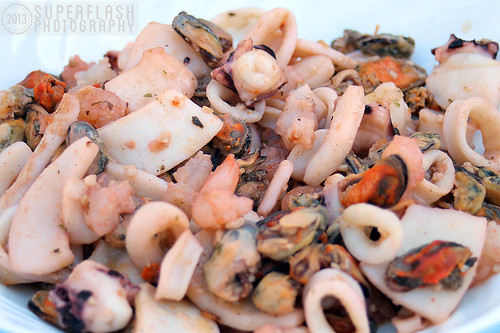
Primal seafood medley with garlic-butter sauce

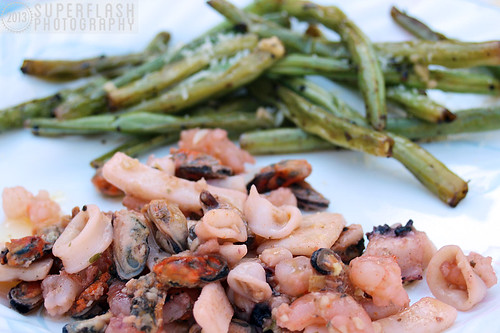
I don't know about you guys, but sometimes, I have stockpiles of stuff in my freezer, and no real ideas for it.  We had a couple of bags of seafood that were buy-1-get-1-free at our grocery store... I think they were originally bought for Christmas Eve, but we didn't end up making them that day and they just remained.  This recipe is a really simple way of bringing out the natural flavours of the seafood without being either too bland, or being drenched in sauces.  It does feature a garlic-butter sauce, which was perfect for dipping - we also drizzled it over the green beans served on the side for some extra flavour.  It was perfect for a gorgeous Florida afternoon, and we ate it outside on the back porch in the sun!

Seafood Medley


Seafood Medley For seafood:

Ingredients: 

3 tbsp butter
1 1/2 tsp minced garlic
bag of mixed seafood
1/4 cup white wine
1/2 a lemon
oregano and parsley to taste
(salt if desired)

Method:

1. Melt butter in pan.  Add minced garlic and sautee over medium heat.

2. Once you can start to smell the garlic & butter melting together nicely, it's time to add your seafood.  If it's frozen, it's best to defrost it first (at least partially), so that you don't get a lot of water in the pan as it cooks down.

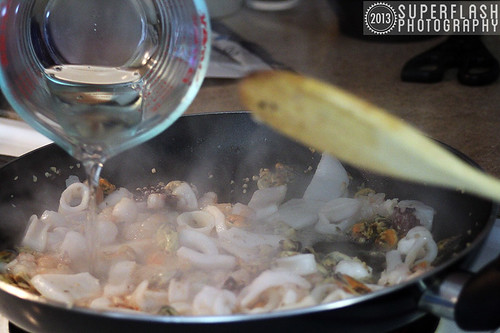
Seafood Medley 3. Continue to sautee over medium heat, and slowly add in your white wine, juice of half a lemon, and spices.

4.  Remove from heat when cooked - should be about 15-20 min.

(Serve with garlic-butter sauce, and a veggie on the side - we liked green beans!)


For sauce:

Ingredients:

1/3 cup butter
2 tsp minced garlic
salt to taste

Method:

1. In a small saucepot, melt 1/3 cup butter.
2. Once melted, add 2 tsp minced garlic, and salt to taste.  Allow the butter to cook down and clarify.
3. Remove from heat right before serving.

(This should be more than enough butter for the seafood, plus some left over)


Serves 2-3.

Seafood Medley

Do you have a favourite way to prepare seafood?  Did you try this recipe?  Leave a note in the comments and let me know!


Pin It

Tuesday, January 29, 2013

Almond Butter Cookies: Recipe Fail, and then Fix!

My husband and I have removed all "temptation foods" out of the house, and we only have real food left - which is great!  Except when it comes to snacks.  Sometimes you just need something to munch on in between meals.  So, I searched the pinterest archive and decided to make some almond butter cookies.  I started with this recipe, but made a few modifications, and cut it in half.  The result was a delicious, but incredibly spread out, thin cookie.  (Fail!)

So then I decided to add some almond flour, because the taste was definitely good, and voila, rescued cookies!  I will come back and edit this recipe in time, but for now, just keep an eye on the consistency of the cookies after you add the almond flour.  I imagine it will probably take about a quarter cup after all is said and done.  I added about 3.5 tbsp to half the recipe.


Batter with almond flour added

Ingredients:
  • 1/2 cup almond butter
  • 1/4 cup honey
  • 1/4 cup maple syrup
  • 1/2 tsp vanilla
  • 1/2 tsp baking soda
  • 1 egg
  • 1/4 tsp cinnamon
  • 4-5 tbsp almond flour
Method:

Unbaked cookies on sheet
1. Preheat the oven to 350.  Combine the almond butter, honey, syrup and vanilla until well mixed.

2. Add in the egg, baking soda,  and cinnamon.

3. Add in the almond flour, paying attention to the consistency of the batter - it should be still somewhat liquidy, but firm.

4. Cover a baking sheet with parchment paper, and drop batter by the spoonful onto the sheet.  The cookies will still spread, so try not to put them too close together.

The result will be a light & fluffy, sweet & delicious almond-y cookie!

Cookies fully baked

One note about these cookies: I'm not sure if it's because I live in Florida and it's more humid here than what I'm used to, but these turned really mushy the next morning.  It helped to store them in the fridge, and then pop them in the toaster oven for 2-5 minutes at 250 degrees before serving.  Back to normal!

Let me know if you try this recipe, and leave your hints and tips in the comments!


Pin It

Monday, November 12, 2012

Primal Shepherd's Pie + Long distance date night tip

In a long distance relationship, you have to come up with little things to keep the romance alive.  Our little "thing" that we came up with is Skype cooking date nights!  Every Friday (unless one of us has something scheduled), we choose a recipe (we usually try to pick something primal or paleo), and we Skype with each other while we both make the same dish.  It's the best of all worlds, really - we get to spend quality time with each other, and at the end of it all, we get a great meal!

On Thursday, Tommy decided that we should make primal shepherd's pie, with sweet potato mash.  I looked around everywhere and couldn't find a recipe.  I called my mom and asked for her regular mashed potato recipe, and then continued from there.  My recipe is listed below - I think Tom added a few extra spices to his (rosemary & cinnamon)


For the sweet potato mash:
2 sweet potatoes
1-2 tbsp butter
salt & pepper
1/4 cup (or less) of milk of your choosing (unsweetened/unflavoured almond or coconut, or regular milk)

For the meat:
1 lb. ground beef
olive oil
1/4 cup chopped red onion
1 cup peas & carrots (I just use frozen, but if you prefer fresh, go for it)
Spices to taste (I used salt, pepper & garlic powder)

Optional:
shredded cheddar cheese (about 1/4-1/2 cup)


Method:
1. Begin by washing, peeling and cubing your sweet potatoes.  Add them to a sauce pot filled with water. Bring the water to a boil, and boil until sweet potatoes are soft (about 20 minutes ought to do the trick).

2. While the potatoes are boiling, stir fry your meat.  Cook until it's done, then drain it & set aside in a dish.  At this point, you can probably set your oven to preheat to 350.

3. Strain the sweet potatoes and add to either a large bowl & hand mash, or a kitchenaid mixer bowl.  Add 1-2 TBSP butter, salt & pepper to taste.  Mix on low.  Add milk a drop at a time until you get the right consistency - be careful not to add too much at once, like I did!  Continue mixing until the consistency looks right.

4. Clean the frying pan.  Add olive oil, and your chopped onion.  Stir fry until soft.  Add your peas & carrots until cooked.  Add the meat back to the pan.  Add spices of your choosing (I went with salt, pepper & a bit of garlic powder).

5. In an oven-safe dish, add a layer of the meat-veggie mixture.  Then (Tommy's secret ingredient time!) add a thin layer of cheese.  Add the rest of your mixture.  Then top with the sweet potatoes, and add more cheese on top if desired.

6. Add the dish to a preheated oven, and cook for about 15-20 minutes (cheese should be melted, and the top a little browned)

Serve & enjoy!


Pin It

Wednesday, October 3, 2012

Primal Cheesy Chicken Roll-Ups

There's a recipe going around the paleo/primal boards on pinterest that looks delicious - but until you click on it, there's no indication that it's actually not paleo.  It calls for both breadcrumbs and flour.  And while it does look delicious - the description that is attached to it on pinterest is completely wrong.  I've taken it upon myself to create a recipe based on the description that is running rampant.  


Cheesy Chicken Roll Ups (aka Chicken Kiev wannabe)

Ingredients:
- 5 chicken breasts (butterfly cut, if possible)
- 1 small white onion
- 1 tbsp parsley
- 1tbsp garlic
- salt & pepper
- mozzarella (about 85 grams)
- butter

Method:
preheat oven to 400

Saute 1 small onion (about 125g) in butter until soft.
Remove from heat, add parsley (fresh, if you have it available - I used dry) and garlic (either 1 clove, minced, or 1 tbsp powder).

If using whole chicken breast, pound with a meat mallet until flat.  If using butterflied chicken breast skip to next step.

Place some butter in your baking dish, and melt in the preheated oven.
In the meantime, sprinkle salt and pepper on your flattened chicken, then spread some of the onion mixture on top.  Place a small rectangle of mozzarella (about 2" by 0.5" sticks) in the centre of the chicken, roll it up and secure with a toothpick.  Repeat for all rolls.

Using the same pan that you used to saute the onion, add a little bit more butter, and brown each roll lightly.  (I prefer to work with one chicken roll at a time, however this is more time consuming - if you're more talented than me, work with more than one at a time).  Continue until the outside of the chicken is brown - the inside will still be pink.  This infuses some of the flavour into the chicken and gives it a nice colour.
(NB: the chicken is still raw at this point - do not consume!!)


Place the browned chicken into your oven-safe dish that already has butter at the bottom.  Cook in a 400 degree oven for 15-20 min or until chicken is no longer pink and heated to 190 degrees.  Do not overcook or chicken will become dry.

Serve with your choice of veggie side-dish (I had snap peas, sauteed in more butter and garlic!)


Leave me a note if you decide to try this - let me know how it turns out for you!


Pin It

Tuesday, August 7, 2012

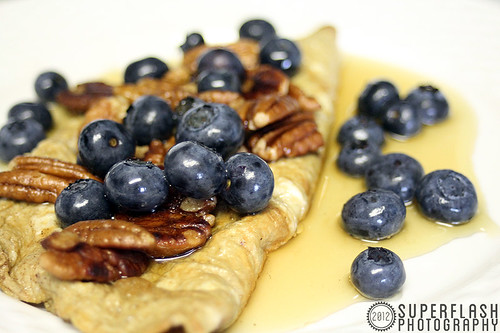
Sweet Omelette with Cinnamon Toasted Pecans (Primal)

This is my absolute favourite Primal breakfast, hands down.  If you're craving the taste of pancakes, but  don't feel like whipping up the egg whites for light, fluffy coconut flour pancakes, or don't feel like the heaviness of almond flour pancakes... this is the recipe you want.  It's quick, easy and delicious.
sweet omelette

Ingredients:

For the Omelette:
- 2 eggs
- 1 tsp vanilla
- dash of cinnamon
- butter for pan (about 1tsp)

For the Pecans:
- 1/2 cup pecans (I make extra so that I can snack on them later!)
- 2 tbsp butter
- 1 tsp cinnamon

Serve with:
- maple syrup
- blueberries or other fresh berries

Method:
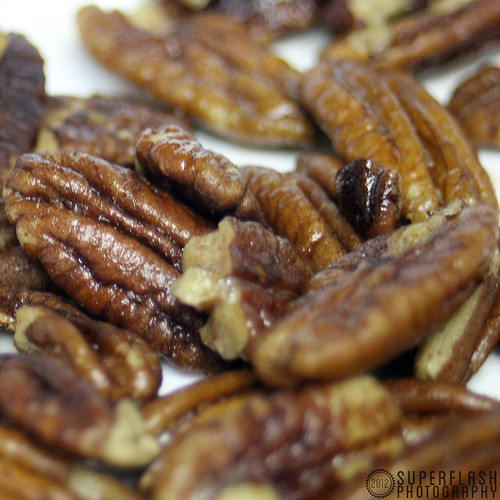
cinnamon toasted pecans 1. Start with the pecans: In a small frying pan, melt 2 tbsp of butter.  When melted, add your pecans + cinnamon and sauté until the pecans look slightly softened and glisten with the butter.  Remove from heat and set aside in a dish.

2. In a bowl, beat the two eggs, vanilla and cinnamon.  Melt the butter in the pan, and then pour the mixture in.  When it starts to bubble on the sides, carefully flip it.  Once cooked, remove from pan and fold over on your plate.

3. Spoon the cinnamon-toasted pecans, and add some berries on top, then drizzle with maple syrup and serve!

The whole process takes less than 20 minutes - if you time it well, you may even be able to get a breakfast like this in before work or school!  Please let me know if you try this, and what you think!


Pin It

Wednesday, July 18, 2012

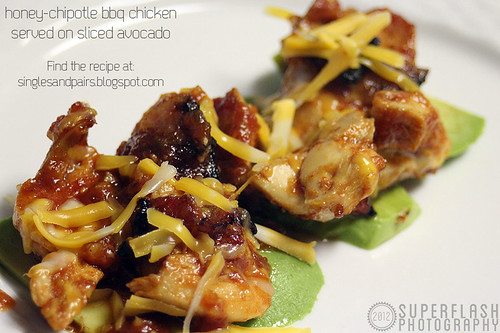
Primal Honey-Chipotle BBQ Chicken

I found the base for this recipe on Pinterest, and thought it would be easy to adapt this to a primal-friendly recipe using ingredients that I had on hand in my kitchen... and I was right! This is possibly one of my favourite recipes I have come up with to date - I highly recommend this one!  Without further ado - the Honey-Chipotle BBQ Chicken.

Honey-Chipotle BBQ Chicken


Ingredients
  • 1/2 cup water
  • 1 teaspoon ground cumin
  • 4 garlic cloves, thinly sliced
  • 2 chicken breasts
  • 1 tablespoon ground chipotle
  • 1 tablespoon olive oil
  • 1 tablespoon minced garlic
  • 1 teaspoon ground cumin
  • 1/2 cup tomato puree
  • 1 teaspoon tapioca (or more, if necessary)
  • 1/4 cup apple cider vinegar
  • 3 tablespoons honey
  • 1 tablespoon tamari
  • 1 slice bacon, cooked
  • 1 avocado
  • 2 ounces cheddar cheese, shredded

Preparation

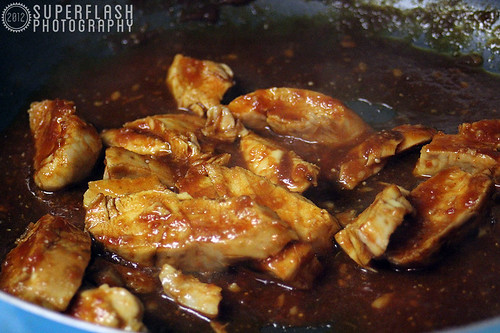
Combine water, 1 teaspoon cumin, 4 sliced garlic cloves, and chicken in a large saucepan. Cover and bring to a boil over medium-high heat. Reduce heat to medium-low; cook 10 minutes or until chicken is done.  (Keep an eye on the chicken - I left mine alone, and ended up with a burnt saucepan... thankfully the chicken was fine though!) Drain, and place chicken on a cutting board. Cut chicken across grain into thin slices; keep warm.

Honey-Chipotle BBQ ChickenWhile chicken is cooking, begin preparing sauce.  Heat oil in a large nonstick skillet over medium-high heat. Add 1 tablespoon minced garlic; sauté 3 minutes or until just beginning to brown. Add 1 teaspoon cumin; sauté 1 minute. Stir in tomato puree; cook 4 minutes or until mixture thickens to a pastelike consistency, stirring constantly.  Add the chipotle seasoning and stir.  If your sauce does not thicken, add in tapioca, 1 teaspoon at a time, as necessary.  Stir in vinegar, honey, and Tamari. Add sliced chicken to sauce; simmer for 3 minutes or until thoroughly heated.

Preheat broiler.

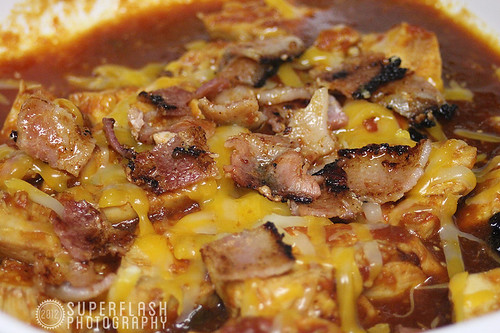
Honey-Chipotle BBQ ChickenAdd your chicken & sauce in a single layer to an ovenproof dish.  Spread your shredded cheddar cheese on top of the chicken.  Dice bacon & spread it on top of the cheddar.  Place the dish under the broiler until the cheese melts (about 2 minutes).

Slice your avocado onto your plate.  Spoon the chicken on top of the avocado.  Add extra cheese if desired, and serve hot!

Serves: 2


Honey-Chipotle BBQ Chicken 

Pin It